Efficiency Meets Elegance: Time-Saving Tips for Repainting Your Home’s Interior

A fresh coat of paint can do wonders for your home’s interior, transforming spaces from outdated to invigorating or dull to dazzling. But let’s face it, the process can often seem daunting, especially when balancing the need for quick results with the desire for a polished, professional look.

Whether you’re an experienced DIY enthusiast or a novice eager to revitalize your living space, striking that balance between efficiency and elegance is key. In this guide, we’ll walk you through the intricacies of repainting your home’s interior, ensuring you save time without sacrificing quality. Discover how to refresh your walls with finesse and flair, blending practicality with panache.

Repainting Your Home's Interior

The Planning Phase: Setting Yourself Up for Success

Painting might seem as simple as dipping a brush and applying colour, but the truth is, like any art form, the beauty lies in the details, especially the preparation. Let’s break down the crucial steps for a flawless paint job.

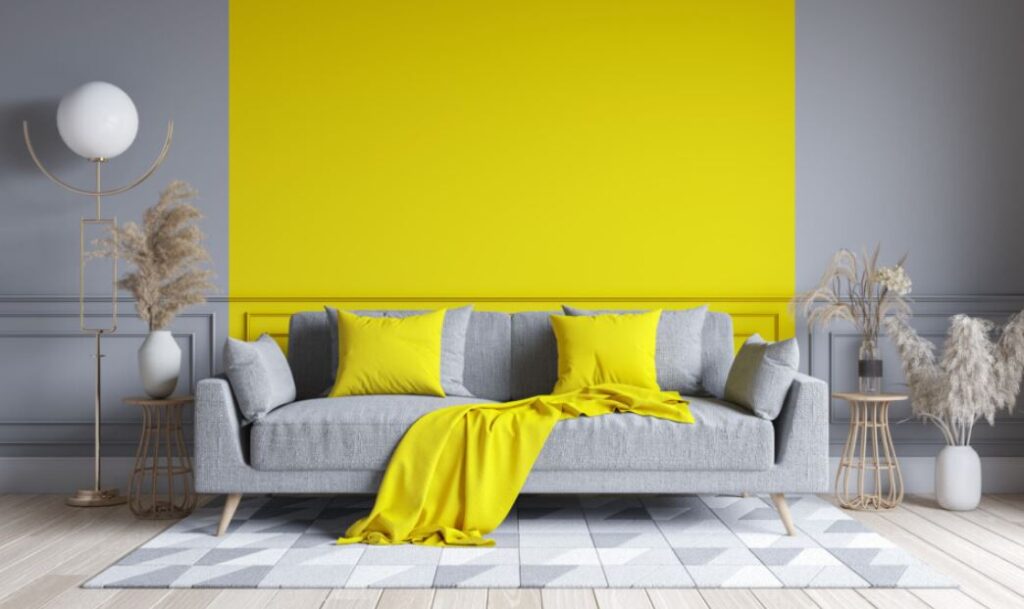
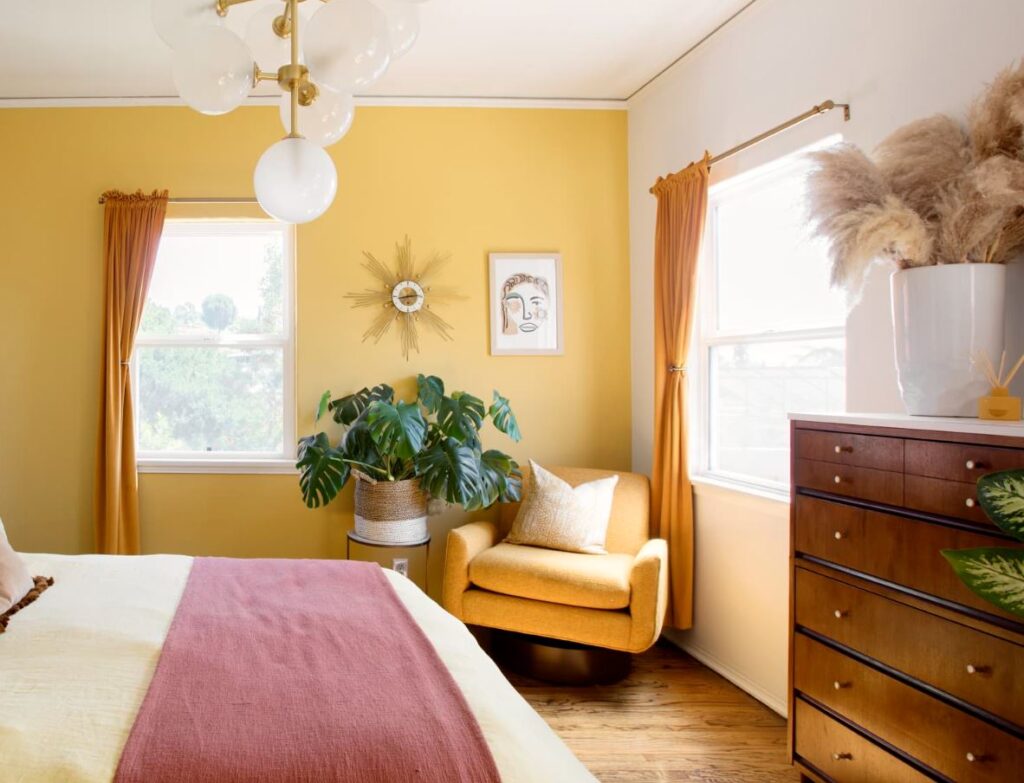
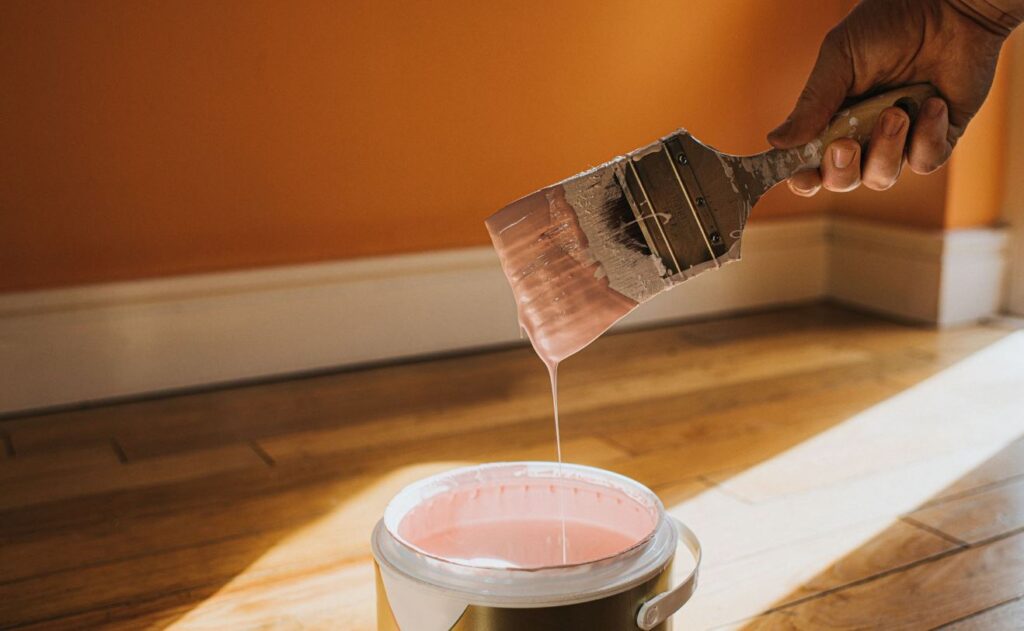
Choosing the right paint colour is about more than personal preference; it’s an art backed by science. Each hue can dramatically alter the perception of a room’s size, lighting, and mood.

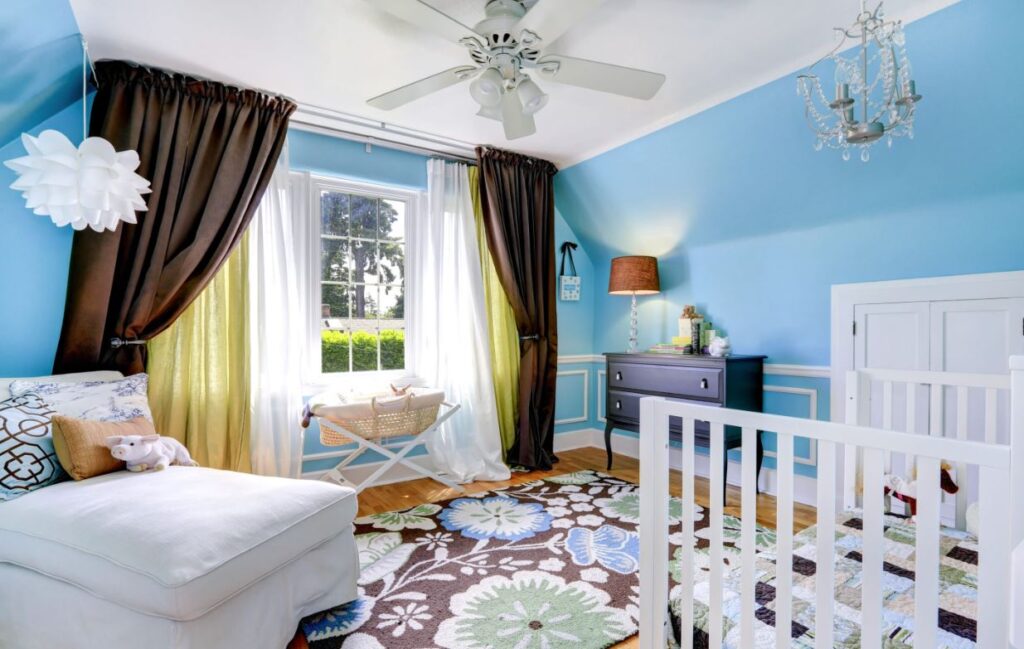
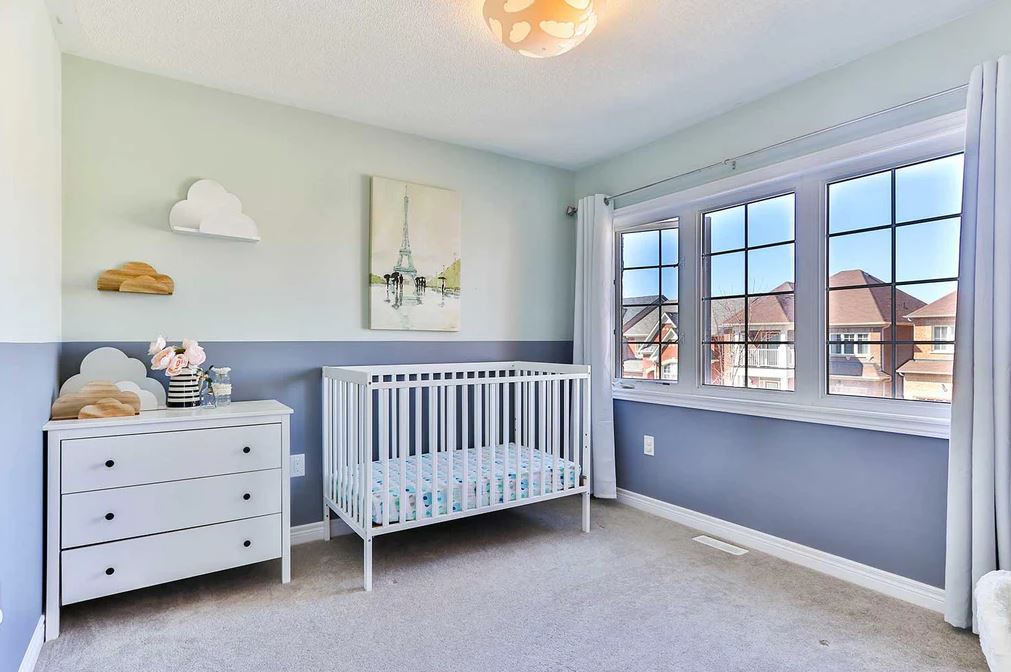
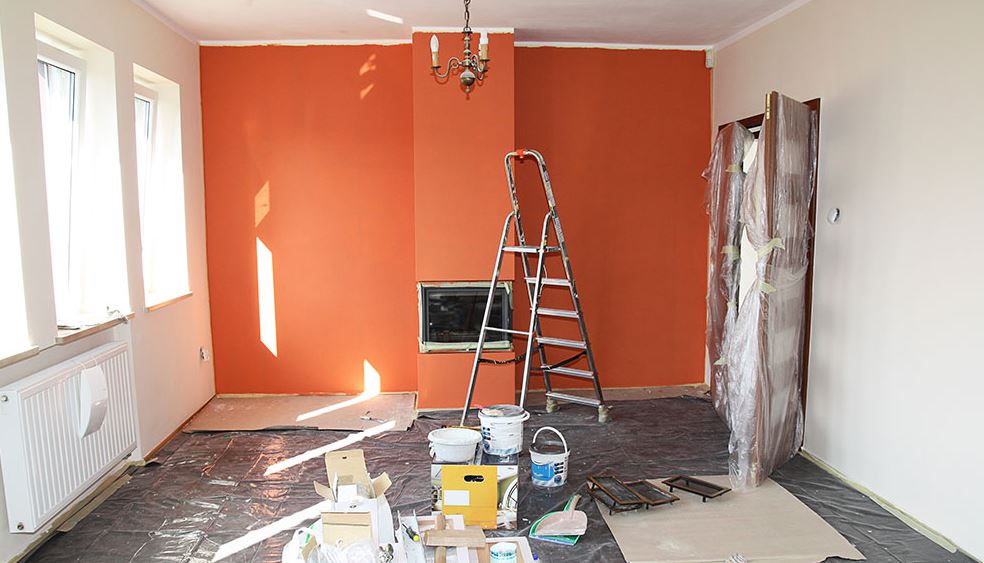
Considering room size, lighting, and mood: A darker shade might make a spacious room feel cozier, while lighter tints can make a small space appear larger. Natural light, or lack thereof, will affect how a colour is perceived. Likewise, colours evoke emotions. While blues and greens typically bring calmness, reds and oranges exude energy.

Using paint samples and swatches:

  1. Don’t rely solely on the colour chip from the store.
  2. Invest in samples, painting small swatches on the walls.
  3. Check them at different times of the day to see how varying light conditions influence their appearance.

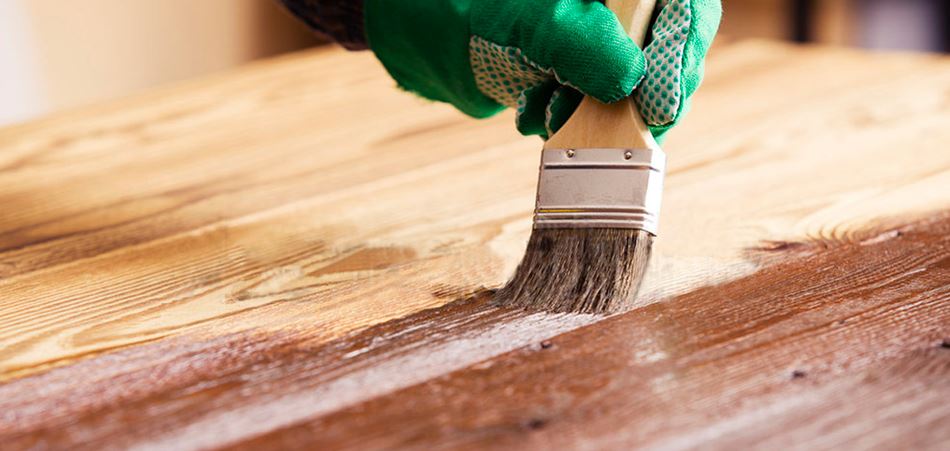
Half the battle is ensuring you have the right tools.

Comprehensive list: Quality brushes for precision, rollers for larger surfaces, painter’s tape for sharp edges, drop cloths to protect your belongings, a ladder for those hard-to-reach places, and of course, your chosen paint.

Consider factors like drying time, the order of rooms (usually from least used to most used), and your availability. Start with the guest room, allowing mistakes to be made where fewer eyes will see.

Preparation: The Key to a Smooth Painting Experience

You would only cook a gourmet meal if you prepped the ingredients first. Similarly, painting requires foundational work.

  • Decluttering and furniture arrangement: A clear workspace is essential. Remove or shift furniture to the centre of the room, covering it with a drop cloth. This decluttering provides easy access to walls and prevents accidental paint splatters on your cherished items.
  • Wall preparation:
    • Cleaning surfaces: Dirt, dust, and grime can hamper paint adhesion. A simple wipe-down with a damp cloth or a specialised cleaning solution can make a difference.
    • Patching up holes and cracks: Use a putty knife and spackling paste to fill in any imperfections for a seamless finish. Once dry, sand it down for an even surface.
    • Sanding for a smooth canvas: Older paint jobs might have left drips or rough spots. A quick sanding, even on seemingly smooth walls, ensures better paint adhesion.
    • Masking and taping: Protect areas you intend to avoid painting. This includes baseboards, door frames, window sills, and light switches. Quality painter’s tape gives a sharp edge, ensuring your lines are clean and professional-looking.

Techniques for Efficient Painting

With the stage set, let’s get to the heart of the matter.

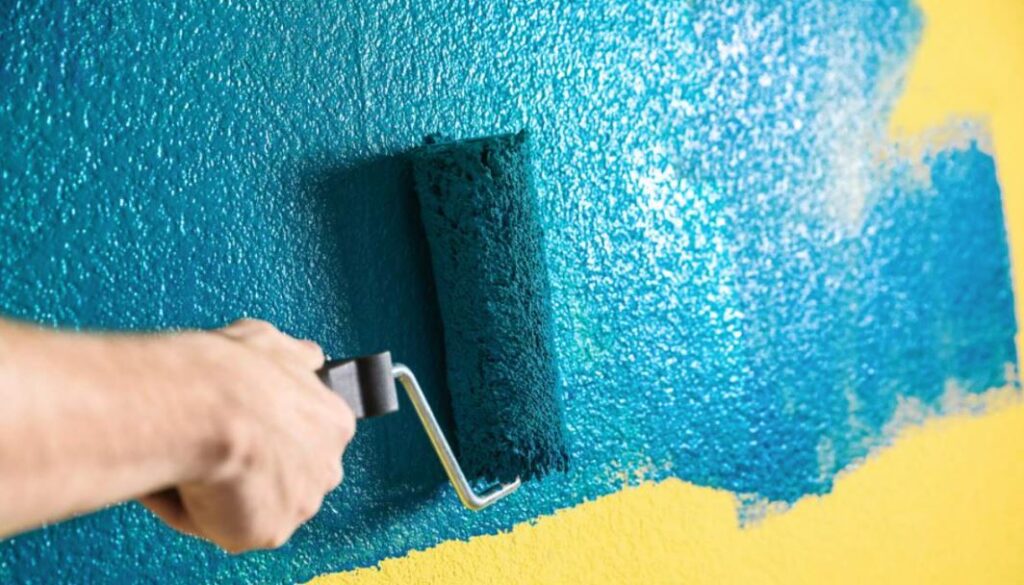
  • Starting with the edges: ‘Cutting in’ is the process of painting the edges or corners of a room. Using a brush, create a border, making filling in the larger areas easier with a roller.
  • Using rollers for large surfaces allows you to cover a vast space quickly. Dip the roller into the paint tray and roll it back and forth to ensure even coverage. Spread the paint using a “W” or “M” pattern, ensuring no part of the wall remains untouched.
  • Maintaining a wet edge: Always keep a wet edge to avoid visible lines or ‘lap marks.’ This means you overlap your previous stroke before completely dries, ensuring seamless blending.
  • Working top to bottom: Begin near the ceiling and work your way down. This method catches any drips, ensuring a smooth finish and less backtracking.

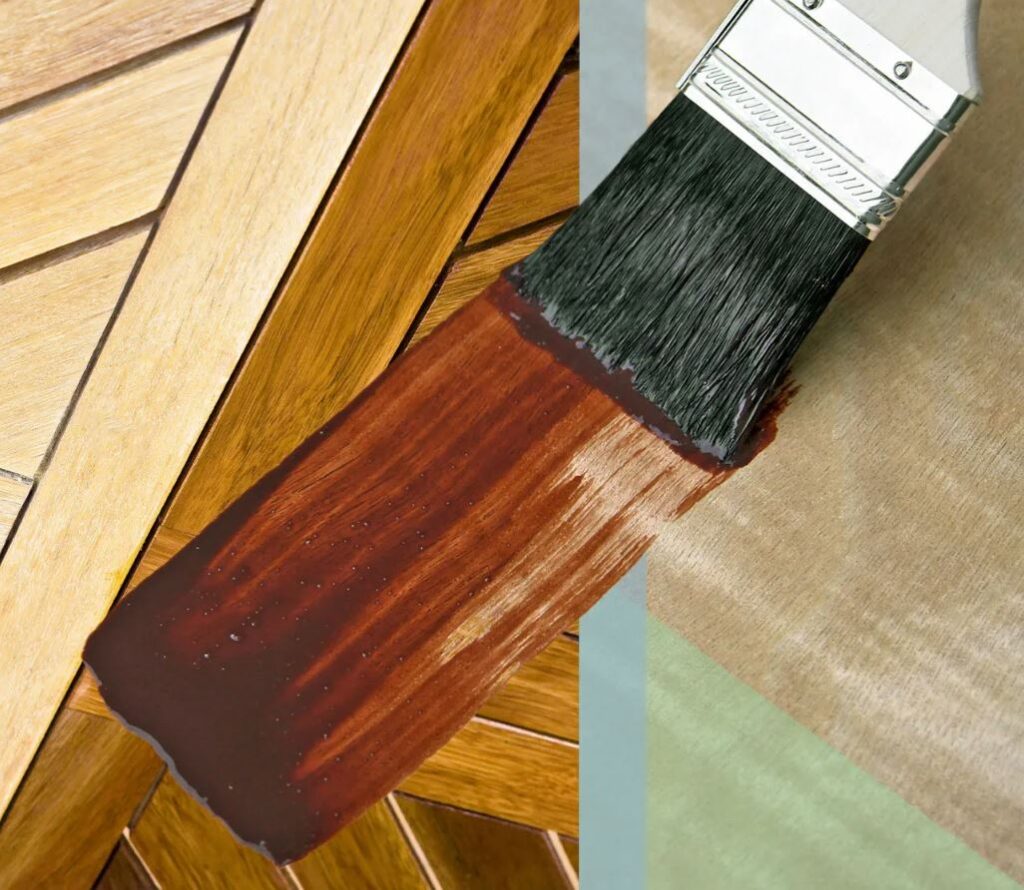
Choosing the Right Paint for the Job

Selecting the perfect paint is akin to choosing the right fabric for a tailored outfit. Each serves a purpose suited to specific needs and aesthetics.

The pros and cons of different paint finishes:

  • Matte: A flat, non-reflective finish that hides imperfections but can be less durable and harder to clean.
  • Eggshell: Offers a subtle shine, is more washable than matte, and works well in living rooms and bedrooms.
  • Satin: With a smooth, velvety look, it’s durable and easy to clean, making it ideal for high-traffic areas.
  • Semi-gloss: Reflects more light, is highly durable and moisture-resistant, suitable for kitchens and bathrooms.
  • High gloss: Highly reflective and easy to clean, it’s great for trim and doors but might highlight wall imperfections.

Primers ensure paint adhesion, block stains, and create a uniform surface. While modern paint often includes built-in primers, using a separate primer can benefit porous surfaces, drastic colour changes, or when painting over oil-based paints.

Repainting Your Home's Interior

Technological advancements have brought paints that cover in one coat or have self-priming abilities. These options can save hours of your project without compromising on the outcome.

Clean-Up and Maintenance

The paint’s on the walls, but the job isn’t over yet.

Warm water and mild soap work for water-based paints, while mineral spirits or paint thinner are needed for oil-based paints. For brushes, massage the bristles softly, and for rollers, use a scraping tool to remove excess paint before washing.

Label cans with the room and date of painting. Sealed tightly and stored in a cool, dry place, paint can last up to 10 years. Before reuse, ensure there’s no foul odour or lumpiness.

Wear and tear are inevitable. Keep a small container or a touch-up pen filled with the room’s paint for easy touch-ups.

A masterpiece is defined by its details.

Consider accent walls in contrasting colours or decorative techniques like sponging, rag rolling, or stencilling to bring depth and texture.

Reinstall outlet covers, hang artwork at eye level, and rearrange furniture to complement your fresh walls. Consider new throw pillows or decor pieces that match or contrast your new colours.

The journey of repainting embodies transformation – from the initial strokes of primer to the final placement of decor. The rewards of a well-executed paint job aren’t just in the vibrant walls but in the rejuvenated spirit of the space. As you’ve seen, achieving this balance of efficiency and elegance isn’t elusive; it’s methodical. With every brush and roller, you’re not just painting walls but crafting a home. Embrace the process, and let every corner of your abode reflect your unique blend of practicality and panache.…

The Lifespan of Exterior Paint: How Long Can You Expect It to Last?

A home’s exterior paint isn’t just about aesthetics; it is the frontline defence against the elements, keeping the structure safe and intact. From fierce sun rays to relentless rain and snow, the exterior paint has its work cut out for it, and its vibrancy and effectiveness inevitably diminish over time. But have you ever wondered how long you can expect your exterior paint to last before it requires a fresh coat?

While there’s no one-size-fits-all answer, various factors come into play, from the quality of the paint you choose to the climate of your locale. This post delves deep into the lifespan of exterior paint, shedding light on how these factors influence its durability and providing insight into when it might be time for a new paint job. Whether you’re a homeowner looking to renovate or simply curious, read on to gain a comprehensive understanding of the world of exterior paint longevity.

Exterior Paint

Factors Affecting the Lifespan of Exterior Paint

Quality of Paint

The market is flooded with paints of varying quality levels. Low-quality paints, while often more affordable, tend to have a thinner consistency and may need to cover surfaces more effectively. They may fade faster, peel or chip more readily, and prove less resistant to environmental factors. On the other hand, high-quality paints are formulated with premium ingredients, offering richer pigmentation, superior coverage, and enhanced durability. The difference in longevity can be staggering: low-quality paint might start to show wear in just a few years, while high-quality paint can retain its lustre for a decade or more.

Benefits of Investing in High-Quality Paint: Beyond longevity, premium paints provide better coverage, requiring fewer coats, and can prove more cost-effective in the long run when considering repaint cycles. High-quality paints often come with warranties, giving homeowners peace of mind.

Application Technique

Every painting project’s success is rooted in the prep work. Properly cleaned and primed surfaces ensure the paint adheres better and lasts longer. Rushing through or skipping these steps can lead to premature paint failure. Priming provides a smooth base for the paint, ensuring consistent colour and finish.

Effects of Layering and Priming: A well-layered paint job, starting with primer and followed by the recommended number of paint coats, can significantly boost the paint’s lifespan. Conversely, uneven layers or missed spots can lead to vulnerabilities where weather and moisture can penetrate, shortening the paint’s life.

Weather and Climate

Paint has to stand up to Mother Nature’s whims. Extreme temperatures, whether hot or cold, can cause paint to expand and contract, leading to cracks. Prolonged exposure to UV rays can fade colours, while moisture from rain, snow, or humidity can lead to peeling or blistering.

Regional Considerations: Homes in coastal areas might face the corrosive effects of salt, shortening paint lifespan. Conversely, with their intense sun and heat, desert climates can bake paint, leading to fading and chipping. It’s essential to choose paint formulations suitable for your specific regional challenges.

Maintenance and Upkeep

Like most aspects of home care, maintenance can make all the difference. Regularly cleaning the painted surfaces, such as gentle washing to remove dirt and mildew, can help the paint retain its fresh look. Prompt touch-ups on any chips or cracks can prevent further deterioration.

Benefits of Periodic Inspections: Regular inspections allow homeowners to catch potential problems early. Addressing minor issues immediately can prevent major repaints and save money in the long run.

Surface Material

The material of the exterior surface plays a significant role in paint longevity. Paint on wood might face challenges like rot or insect damage. Stucco can absorb more moisture, while metals might deal with rust. Each material has specific prep needs and may require specialised paint formulations for maximum longevity.

Typical Lifespan Estimates by Paint Type

Water-Based (Latex) Paints

Pros and Cons: Water-based paints are known for their ease of use and quick drying times. They’re resistant to yellowing and often have low levels of toxic emissions. However, they might not be as durable as some oil-based counterparts when facing extreme weather conditions.

Estimated Longevity: High-quality latex paints can last anywhere from 5 to 10 years on exterior surfaces with proper application and maintenance.

Oil-Based Paints

Pros and Cons: Oil-based paints offer a smooth, glossy finish and are exceptionally durable. They adhere well to surfaces, providing a resistant barrier against environmental factors. However, they can take longer to dry, may become yellow over time, and have higher volatile organic compounds (VOCs) levels.

Estimated Longevity: Given the durable nature of oil-based paints, they can last up to 10-15 years, depending on the environment and maintenance.

Specialty Paints

These are formulations tailored for specific conditions or effects. UV-resistant paints can counteract the sun’s harmful effects, and mould-resistant variants can fend off mildew in humid climates.

Estimated Longevity: The lifespan of specialty paints varies based on their formulation and the challenges they’re designed to counteract. However, with proper application, they can often exceed the longevity of standard paints, lasting upwards of 10 years or more.

Signs It’s Time to Repaint

Peeling or cracking is a tell-tale sign that the paint’s protective properties have deteriorated. This means the underlying structures might be at risk from moisture or pests, making it imperative to address the issue promptly.

Sun exposure, rain, and changing temperatures can cause paint to lose its vibrancy over time. If your home’s exterior looks significantly lighter or different than when you first painted, consider a repaint.

Exterior Paint

Dark spots or fuzzy growths on the paint indicate mould or mildew presence. Not only do they mar the appearance, but they can also pose health risks and compromise the paint’s integrity.

Over time, some paints can break down into a chalky residue when touched. This indicates the paint’s binder is deteriorating, and the protective layer is wearing thin.

Tips for Extending the Life of Exterior Paint

Keeping the painted surfaces clean helps maintain their appearance and integrity. Simple practices like washing off dirt and debris can prevent them from embedding into the paint or causing micro-scratches.

These sealants add an extra layer of defence against the sun’s harsh UV rays, ensuring the paint underneath remains vibrant and intact for longer.

As tempting as it might be to save some money upfront, cheaper paints can cost more in the long run due to their reduced lifespan and the need for frequent touch-ups or repainting.

Professional painters have the expertise to ensure surfaces are appropriately prepared and the paint is applied effectively. Their skills can significantly contribute to the longevity of the paint job.

Understanding the expected lifespan of exterior paint is more than just a matter of aesthetics; it’s a crucial component in the protection and upkeep of a home. With environmental factors, quality of materials, and application techniques playing vital roles, making well-informed decisions is essential. By investing in quality materials and ensuring proper application, homeowners can enjoy vibrant and enduring paintwork that beautifies and safeguards their homes. In the grand scheme of home maintenance, putting thought and care into an exterior painting can yield lasting and impressive results.…

10 Creative Ways to Transform Your Living Space with Paint

When we think of revamping our homes, the thought often drifts to expensive furniture, avant-garde art pieces, or even top-tier interior decorators. But what if the magic wand you’ve been seeking is in your storage closet, in the form of a paint can? The versatility of paint is unmatched.

With a diverse palette of colours, myriad finishes, and countless techniques at your fingertips, the possibilities are as boundless as your imagination. Whether you’re a seasoned DIY enthusiast or someone just starting, this guide will explore ten inventive ways paint can be used to reinvent and rejuvenate your living space. Let’s dive into this vibrant world and unlock the transformative power of paint!

Transform Your Living Space with Paint

Ombre Walls

There’s something almost mystical about the ombre technique. It’s the art of seamlessly blending one colour hue into another, creating a dreamy transition reminiscent of sunsets or ocean depths. Ombre walls bring contemporary elegance and can make any room come alive.

Steps to Achieve the Ombre Look:

  • Start by selecting two complementary colours: one as your base colour and the other, often a shade darker, to create the gradient effect.
  • Paint your entire wall with the lighter shade first. This serves as your base.
  • Apply the darker shade at the bottom while the base coat is still wet. Using a wide, dry brush, sweep upwards, blending the dark paint into the base colour.
  • Continue this process, adding more darker paint and blending upwards until you achieve the desired gradient effect.

Where It Looks Best: Ombre walls make stunning focal points in living rooms, bedrooms, or bathrooms. They can be paired with minimalist decor to let the wall take centre stage.

Photo Inspiration: Imagine a bedroom with a blue ombre wall, transitioning from a gentle sky blue at the top to a deep navy at the base, perfectly capturing the essence of a night sky.

Geometric Patterns

For those with a penchant for structure and symmetry, geometric patterns are your canvas. With just some painter’s tape and patience, your walls can be transformed into works of art, bursting with triangles, hexagons, or any shape that sparks your fancy.

Steps and Tips:

  • Plan your design on paper first. Measure and mark your walls accordingly.
  • Use painter’s tape to outline your shapes, ensuring they are straight and evenly spaced.
  • Play with colour combinations. Contrast bold colours with softer shades for a dynamic look.
  • Paint carefully within the taped sections. Once dried, gently peel off the tape to reveal clean, sharp lines.

Possible Rooms: Children’s bedrooms come alive with playful triangles or diamonds. Accent walls in living rooms or hallways stand out with hexagonal patterns, creating a modern, chic atmosphere.

Painted Ceilings

The ceiling, often overlooked, is fondly termed the “fifth wall.” Why leave it plain when it offers so much potential? Drenching it in colour can dramatically transform your room’s ambience.

Recommendations: Pastel shades can make a room feel airy and expansive, while deeper hues like midnight blue or forest green can create a cozy, enveloping feel. Whether you prefer matte finishes for a classic look or gloss for a bit of shine, the choice is yours.

Tips:

  • Always start with a primer to ensure even paint application.
  • Use a roller with an extended handle to make the process easier and more ergonomic.
  • Always paint in one direction to avoid visible lines and unevenness.

Chalkboard Paint

Bring a dynamic edge to your space with chalkboard paint. These walls are decorative and functional, allowing you to jot down notes, doodle, or let your kids unleash their creativity.

Ideal Locations: A chalkboard wall in the home office can help track tasks. In the kitchen, it can be your ever-changing menu or shopping list. And in kids’ rooms? A constantly evolving artwork.

Maintenance and Usage Ideas: Using a damp cloth removes old drawings and writings. Pair with wooden or metallic frames to section off areas or add a decorative touch.

Faux Finishes

For those who adore the rustic charm of aged walls, or the texture of fabrics, faux finishes are the answer. Techniques like sponging, ragging, or graining can replicate various textures and appearances, adding depth and character to your walls.

Introduction: Sponging involves dabbing a wall with a sponge to produce a textured pattern. Ragging uses a crumpled rag to create irregular patterns, while graining imitates the appearance of the wood grain.

How These Add Texture and Depth: These techniques break the monotony of flat colours, producing a tactile and visual appeal. They can make a wall look aged, luxurious or even give it the feel of a different material.

Suitable Rooms and Styles: Faux finishes work wonders in classic or vintage-styled rooms. A faux-aged wall can add to the charm of a study, while a living room with faux fabric walls can exude luxury.

Murals and Large-scale Art

Imagine your favourite scene from nature, an iconic cityscape, or even a fantastical realm on your living room wall. Murals are all about turning a plain wall into a breathtaking masterpiece.

How to Plan and Execute:

  • Begin with a clear vision or reference image.
  • Sketch or project the design lightly onto the wall.
  • Use stencils for intricate patterns or detailed components.
  • Paint layer by layer, starting with the background and gradually adding details.

Collaborating with Local Artists: If you’re not artistically inclined, commissioning a local artist can be both a way to ensure a stunning mural and a means to support local talent. The artist brings a unique perspective and skill set that can truly elevate the art.

Colour-blocking

Taking cues from modern art, colour-blocking involves painting different sections of a wall in contrasting colours. The result is a visually striking space filled with geometric charm and vibrant hues.

Transform Your Living Space with Paint

Inspiration: Think of the abstract works of Piet Mondrian or the colour theories of Josef Albers.

Tips:

  • Ensure clear and sharp delineations between colours.
  • Choose hues that contrast yet complement each other, creating drama and harmony.

Two-toned Walls

Splitting wall colours horizontally allows you to manipulate your room’s perceived height and size. The effect is both stylish and strategic.

The Effect: A darker shade on the bottom can ground the space, while a lighter hue above can make the ceiling seem higher.

Choosing Colors: Look for complementary shades from the same family, or go bold with contrasting colours for a statement look.

Stencils and Decals

Whether you’re a fan of delicate floral patterns, geometric designs, or motivational quotes, stencils and decals are easy to introduce onto your walls.

How to Apply:

  • For stencils, secure them flat against the wall and paint over them carefully.
  • Decals usually come with adhesive backs and can be applied directly.

DIY vs Store-bought: While store options provide convenience, creating a custom stencil allows personalization and uniqueness.

Metallic and Pearlescent Finishes

Add a touch of luxury with paints that shimmer and shine. Metallic and pearlescent finishes reflect light, giving your walls a glowing, luxurious look.

Usage:

  • Use them sparingly as highlights, or go bold with an entire wall.
  • Ensure even application to avoid streaks.

Pairing with Lighting: Position lights strategically to enhance the reflective qualities of these paints, amplifying their effect.

The transformative potential of paint is nothing short of magical. From the calm gradient of ombre walls to the lustrous sheen of metallic finishes, every paint can has a world of possibility. As you stand before a blank wall, remember it’s not just about colouring within the lines; it’s about painting outside the box. We encourage you to experiment, mix, and match techniques. And when you do, share your masterpieces with us. Let’s inspire each other, one painted wall at a time.…

Solid Stain vs. Paint: Which Offers Better Protection for Wood Surfaces?

With its timeless charm and organic appeal, wood has long been a popular choice for decks, sidings, furniture, and many other applications. However, like any natural material, wood is susceptible to elements like moisture, UV rays, and time. Its beauty can be short-lived if not protected adequately. This brings us to a crucial debate that many homeowners, DIY enthusiasts, and professionals grapple with: should they use solid stain or paint to safeguard their beloved wooden surfaces?

These options offer unique advantages, promising protection and longevity, yet their differences can make one more suited to a particular application than the other. In this blog post, we’ll delve deep into solid stains and paints, contrasting their benefits, application processes, durability, and more to help you decide on your wood protection needs. Dive in, and let’s explore which of the two reigns supreme!

Solid Stain vs. Paint

What is Solid Stain?

Definition and Basic Composition of Solid Stain: Solid stain, also known as opaque stain, is primarily designed to colour wood while allowing the texture to show, though not necessarily its natural colour. This stain comprises a mixture of pigments, binders, and solvents. The binders help the stain adhere to the wood’s surface, the solvents assist in application and drying, and the pigments provide colour. Unlike transparent or semi-transparent stains, solid stains are heavily pigmented.

How it Interacts with Wood Surfaces: Solid stains penetrate the wood’s surface but not as deeply as transparent stains. They leave a thin film on the top, making some of the wood’s texture visible. However, the high pigment concentration means the wood’s natural colour is often masked. This provides an opportunity for significant colour change while retaining the feel and texture of the wood.

What is Paint?

Definition and Basic Composition of Paint: Paint is a coating material made from pigment, resin, solvents, and various additives. Its primary purpose is to protect surfaces and provide colour. Unlike stains, paints form a thicker film on the surface, often masking both the colour and texture of the wood beneath.

Interaction with Wood Surfaces: When applied to wood, the paint sits atop the surface, creating a barrier against external elements. It offers a uniform and often glossy appearance, hiding the wood grain. The resultant look is smooth, consistent, matte, semi-gloss, or glossy, depending on the chosen finish.

Comparison of Solid Stain and Paint

Application Process:

  • Ease of Application: Both solid stain and paint can be applied using brushes, rollers, or sprayers. Solid stains are usually easier to work with as they spread more uniformly over wood. On the other hand, paint might require a primer, especially on untreated wood, to ensure better adhesion and a uniform appearance.
  • Preparation Steps: For both options, the wood surface should be clean, dry, and free from any mildew or mould. Sanding might be necessary to remove old finishes or rough spots. Paint often requires additional steps like priming.
  • Number of Coats: Generally, solid stain requires one or two coats, depending on the wood’s porosity and the desired opacity. Paint usually demands at least two coats to achieve a uniform finish.

Appearance and Finish:

Solid stains offer a matte finish, allowing the wood’s texture to shine. At the same time, paints provide a wider variety of finishes, from matte to glossy, hiding the wood’s natural patterns.

Durability:

Both solid stains and paints protect wood from UV rays, moisture, and wear. However, solid stains usually last 3-5 years in high-traffic areas, while high-quality paints can last up to 10 years if maintained properly.

Maintenance:

Solid stains require less frequent touch-ups than paints, especially in areas with foot traffic. Reapplication is easier as the old stain does not need to be stripped off. Paint may chip or peel over time, requiring sanding and repainting.

Breathability:

Wood’s ability to release moisture is crucial to prevent rotting. Solid stains are typically more breathable than paints, making them preferable in humid climates.

Cost:

Initially, the price of solid stain and paint can be comparable, but considering the longevity and maintenance needs, the paint might prove costlier in the long run.

Environmental Impact:

Both products have seen advancements in eco-friendly options. While older paints contain high VOCs (Volatile Organic Compounds), many modern paints are low-VOC or VOC-free. Similarly, eco-friendly stains have gained popularity. It’s crucial to check product labels and choose environmentally responsible options.

Use Cases: When to Use Solid Stain vs. Paint

Deciding between solid stain and paint goes beyond mere appearance and durability. It often aligns with the specific use-case scenario and a few crucial factors.

Factors Influencing the Best Choice:

  • Type of Wood: Softer woods, like cedar and pine, absorb stains better than harder woods, emphasizing their natural grain and texture. Paint, however, can be used across most wood types and offers a consistent finish.
  • Intended Use: High-traffic areas like decks might benefit from solid stains, which are easier to touch up and less prone to chipping than paint. However, paint can be the perfect choice for decorative pieces or surfaces less exposed to wear.
  • Climatic Conditions: In humid or wet conditions, breathability becomes paramount, making solid stains more desirable. In contrast, paint might be more suitable for regions with constant sun exposure since it offers a more substantial UV protection layer.
Solid Stain vs. Paint

Suggestions for Specific Scenarios:

  • Deck: Given the foot traffic, solid stain is generally recommended for decks. It’s easier to reapply and doesn’t peel or chip as easily as paint.
  • Siding: Paint is often preferred for home sidings because of its durability and wide finish options. Properly painted sidings can stand the test of time with minimal maintenance.
  • Furniture: It often boils down to aesthetics. For a rustic, natural look, solid stain works wonders, but paint is your best bet for a refined, sleek appearance.

Tips for Ensuring Long-lasting Protection

Ensuring your wood surfaces remain pristine and protected over the years is not solely about the product choice but also the application and maintenance practices.

  • Proper Preparation of Wood Surfaces: Whether painting or staining, ensure the wood is clean, dry, and free from mildew, mould, or previous finishes. Sanding to smoothen the surface can significantly affect the final appearance.
  • Recommended Brands or Types: While brand preferences can be subjective, always opt for trusted names in the industry. Brands like Benjamin Moore, Sherwin-Williams, or Behr have solid reputations for paints and stains.
  • Application Techniques: Thin, even layers are the key. Whether brushing, rolling, or spraying, ensure uniform application, giving ample drying time between coats.

Choosing between solid stain and paint is not a black-and-white decision. Both offer unique advantages tailored to specific needs and aesthetics. Solid stain champions the natural texture blend with a hint of colour, making it suitable for decks and rustic furniture. On the other hand, paint offers a vast range of finishes and colours, sealing wood surfaces with a protective layer ideal for sidings and refined furniture pieces.

Ultimately, it’s about understanding the nuances of your project, the environment, and your aesthetic preference. Armed with this knowledge, you can decide to not only protect your wood but also showcase its inherent beauty. Whichever path you choose, remember that preparation and quality are your best allies in ensuring the longevity of your wooden assets.…

Expert Tips for Extending the Lifespan of Commercial Paint

In the dynamic world of commercial real estate and business infrastructures, aesthetics undeniably create the first impression. One of the primary aesthetic determinants? Paint. A well-maintained coat of paint can enhance a commercial property’s appeal, conveying professionalism and attention to detail. Beyond aesthetics, the longevity of commercial paint directly correlates with cost savings, avoiding frequent repaints and touch-ups.

Whether you’re a property manager, business owner, or commercial contractor, understanding how to maximize the lifespan of commercial paint is essential. This article delves into expert-endorsed strategies to ensure that your commercial paint looks pristine and stands the test of time. From the intricacies of selecting the right paint to the nuances of application and maintenance, let’s explore how to get the most out of your paint job.

Commercial Paint

Choosing the Right Paint

In the vast realm of commercial painting, not all paints are created equal. The key to a long-lasting, vibrant, and durable finish often begins with choosing the right paint. Here’s a closer look at what that entails:

Cutting corners and opting for cheaper paint might be tempting, especially when covering large commercial spaces. However, investing in high-quality paints pays off in the long run. Premium paints typically have better pigments, binders, and additives. This translates to richer colours, fewer coats required, and enhanced durability. When you invest in top-tier paint, you’re not just buying the liquid in the can; you’re buying the research, technology, and innovation that went into it, ensuring longevity and better wear over time.

Commercial spaces come with varied needs. A warehouse might have different paint requirements than a high-end boutique or a spa. Moisture-resistant paints are invaluable for areas prone to moisture, like bathrooms or kitchens. These are specially formulated to resist mould, mildew, and water damage. On the other hand, high-traffic areas may benefit from paints with a higher sheen, as they tend to be more durable and easier to clean.

The debate between oil and water-based paints is an old one. Oil-based paints, known for their durability and smooth finish, are often chosen for surfaces that need a robust, long-lasting coat, like trim or mouldings. They tend to dry slower but offer a hard, enamelled finish. However, water-based (or latex) paints are easier to clean up, dry faster, and usually have a lower odour. They’re commonly chosen for walls and large surfaces due to their ease of use and versatility. Understanding where and when to use each type is crucial for the paint job’s longevity.

Proper Surface Preparation

The foundation for any great paint job is preparation. Like building a house on a shaky foundation, painting over a poorly prepped surface is a recipe for future problems. Here’s how to ensure the best start for your paint:

Dirt, grease, and other contaminants can be barriers between the paint and the surface. Not cleaning the surface thoroughly risks the paint peeling, blistering, or chipping away prematurely. A combination of soapy water and mildew removers, especially for exterior jobs, can ensure a clean slate.

Primer isn’t just an additional cost or step; it’s the bridge between the surface and the paint. Priming ensures better adhesion of the paint, thus increasing durability. It can also help achieve a more uniform appearance, especially when changing paint colours drastically or over porous surfaces.

Imperfections like cracks, holes, or rough patches can mar the final appearance of a paint job. Filling these imperfections with a suitable filler and then sanding the surface ensures a smooth and even application. Sanding not only smoothens but also creates a slightly roughened texture that improves paint adhesion.

Correct Application Techniques

Once the foundation is set, the application’s success hinges on technique and tools:

Different tools offer varied finishes. Brushes, with their bristles, are excellent for precision, detailing, and smaller areas. Conversely, rollers are suitable for larger surfaces, ensuring quicker and more even coverage. Sprayers, though requiring more expertise, offer a smooth finish quickly, especially over vast spaces. Matching the tool to the task is essential for a professional finish.

It might seem efficient to slather on a thick coat of paint and call it a day, but this can lead to drips, unevenness, and longer drying times. However, seemingly more labour-intensive, multiple thin coats offer a smoother finish, more even coverage, and better durability.

Paint components can settle, producing consistent colour and texture if mixed well. Regular stirring, especially in larger jobs, ensures consistent hue and finish throughout the space. Consider “boxing” the paint for vast areas – mixing multiple cans in a large container to ensure uniformity.

Protection from External Factors

Every well-executed paint job encounters the challenge of enduring external factors. However, it’s not just about enduring but how gracefully the paint withstands these challenges:

Prolonged exposure to the sun’s ultraviolet rays can cause paints to fade, chalk, or deteriorate prematurely. The solution? UV-resistant paints or additives. These specially formulated products act as a shield against harmful UV radiation, ensuring that the vibrancy and structural integrity of the paint remains unaffected.

Commercial buildings are constantly exposed to varying weather conditions – from rain and snow to dramatic temperature fluctuations. Weatherproof paints create a resilient barrier, protecting the paint from moisture infiltration, freeze-thaw cycles, and other elements that could compromise the paint’s lifespan.

While keeping commercial spaces clean is essential, aggressive cleaning techniques can wear down the paint over time. Avoid power washing at high pressures or using abrasive scrubbing tools. Instead, opt for soft brushes or cloths and mild cleaning agents.

Commercial Paint

Regular Maintenance

The key to longevity, in many aspects of life and particularly in paint, is regular maintenance:

Frequent visual checks of the painted areas help spot potential problems before they escalate. Look out for cracks, bubbles, or peeling. These signs can indicate underlying issues like moisture infiltration or poor paint adhesion.

Addressing minor paint issues promptly can prevent larger, more costly repairs. Having some leftover paint stored away can prove invaluable for quick touch-ups, ensuring consistency in colour and finish.

Routine cleaning not only keeps commercial spaces looking fresh but also extends the life of the paint. Using gentle cleaning methods and solutions can help eliminate dirt and grime without causing damage to the paint.

Environmental Considerations

As environmental consciousness grows, it plays a significant role in paint choices and maintenance:

Using Eco-friendly Paints:

Eco-friendly or “green” paints minimise harmful emissions, ensuring healthier indoor air quality. Moreover, many of these paints are formulated to be more durable, reducing the need for frequent repainting and thus contributing to both environmental and economic savings.

Proper Disposal of Paint Materials:

Leftover paint, thinners, and other related materials can pose environmental hazards if disposed of incorrectly. Adhering to local guidelines for hazardous waste disposal ensures safety and underscores a commitment to environmental responsibility.

The intricate art of commercial painting is more than just about colour and coverage; it’s about longevity, durability, and the message a well-maintained space conveys. Extending the lifespan of commercial paint is not just an aesthetic endeavour but also an economic one. Every added year of paint life translates to saved costs in repaints and touch-ups. By adopting these expert tips, businesses make a clear statement: they value quality, longevity, and the finer details. It’s an investment in the property’s future and a testament to the enterprise’s commitment to excellence.…

Creating a Tranquil Haven: Nursery Painting Ideas for a Calm and Serene Atmosphere

When welcoming a new life into the world, the nursery is one of the first and most intimate spaces we create for our babies. This room, bathed in the glow of anticipation and hope, serves as a sanctuary where our little ones begin their journey of dreams and growth. But how do we design a nursery that goes beyond the conventional aesthetics and genuinely soothes the tender senses of a baby?

Understanding that the environment is pivotal in a child’s early development, many parents are now turning to colour psychology to craft a space that induces calmness and fosters well-being. This guide will dive into the nuanced world of colours, exploring how the right hues and designs can set the foundation for a serene and comforting atmosphere. Whether you’re a seasoned parent or a hopeful soon-to-be, these painting ideas will guide you in creating a tranquil haven for your newest family member.

Nursery Painting

The Power of Color Psychology

Few things hold as much sway over our emotions and behaviours when designing spaces as colour. Colour psychology is a fascinating field that delves into how colours affect human behaviour, emotions, and physiological processes.

Colours don’t just beautify a space; they can transform how we feel within that space. For instance, fiery reds may invigorate or agitate, while oceanic blues often soothe and centre our emotions. Understanding the calming hues becomes paramount in a nursery, where the goal is to provide a serene environment conducive to sleep and comfort.

Several studies have shown that certain colours, especially in their muted or pastel forms, can induce feelings of calmness and tranquillity. For instance, soft shades of blue are often associated with the sky and sea, evoking feelings of spaciousness, peace, and reliability. Gentle greens, reminiscent of nature, evoke renewal, harmony, and balance.

Choosing the Right Color Palette

Given the calming potentials of colours, selecting the perfect palette for a nursery becomes a journey of aesthetics and psychology.

Neutral and Pastel Colors: Among the most recommended shades for nurseries are neutral and pastel colours. Soft greys convey a sense of sophistication while retaining warmth, especially when paired with whites or beiges. These colours form a neutral canvas, allowing for versatile décor changes as the child grows. Meanwhile, pastel greens, blues, and pinks maintain their calming effects while introducing gentle vibrancy to the room.

Muted Tones: There’s undeniable magic in muted colours. They carry the essence of the primary colour but are softened, resulting in a restful ambience. This makes them ideal candidates for creating serene environments.

Colour Combinations: Venturing into combinations can help add depth and character to the nursery. Consider the harmonious blend of sage green with cream, which evokes a nature-inspired serenity. The pairing of misty blue with soft grey can create an atmosphere reminiscent of a peaceful morning sky. The coupling of lavender with white can also introduce a touch of whimsical elegance, perfect for a dreamy nursery setting.

The Importance of Finishes

Beyond the hue lies another critical decision – the finish of the paint. Paints come in various finishes, including matte, satin, semi-gloss, and high gloss. Each finish reflects light differently, influencing the ambience of the room.

With its non-reflective surface, a matte finish can reduce visual distractions, promoting a sense of calmness. It’s especially favoured for its ability to hide imperfections on walls. However, when considering a nursery, it’s also essential to consider durability and cleanability. While matte might offer a beautiful aesthetic, satin or semi-gloss finishes might be more practical as they are easier to clean—a critical factor given the unforeseen messes that might adorn the walls over the years!

Incorporating Patterns and Murals

Patterns and murals can serve as enchanting focal points in a nursery, adding depth and interest. However, there’s a fine line between creating an engaging visual and overwhelming the space.

For a calming effect, consider murals with gentle woodland scenes. These can introduce a child to the beauty of nature, with scenes of deer, trees, and soft-hued flowers. Soft cloud patterns, painted or achieved through wallpapers, can mimic the sky, enhancing the room’s tranquillity. Under-the-sea themes, with their soothing aquatic colours, can be a fantastic choice for a touch of adventure without compromising on calmness.

However, when selecting patterns and murals, it’s crucial to ensure they remain soothing and not too stimulating. Large, bold patterns may become visually jarring. Instead, opt for subtle patterns that blend seamlessly with the room’s primary colour, ensuring a cohesive and serene environment.

Additional Design Elements to Amplify Serenity

Beyond paint choices, other design elements play an integral role in elevating the serenity of a nursery.

Curtains, Bedding, and Rugs: These soft furnishing elements can either complement or contrast your chosen palette. Lightweight, breathable curtains in soft shades can filter in natural light, enhancing the room’s calming vibe.

Choosing organic or soft-textured bedding ensures comfort for the baby, and a plush rug can add warmth and a sense of coziness to the space. Remember, the key is in the details. Picking designs synchronising with the room’s theme will weave everything into a harmonious visual tapestry.

Nursery Painting

Natural Elements: Introducing natural materials like wood and stone can ground the room, evoking a sense of stability and connection to nature. Wooden cribs or stone accent walls, for instance, make a style statement and channel the calming energies of the outdoors. Additionally, incorporating indoor plants can breathe life into the nursery. Besides their aesthetic appeal, many plants like the spider or peace lily also purify the air, promoting a healthier environment.

Soft Lighting: Lighting plays a pivotal role in setting the mood. Soft, diffused lighting, perhaps through dimmable fixtures or warm-toned fairy lights, can create a dreamy ambience, perfect for bedtime stories and midnight lullabies. Consider also installing blackout shades for those afternoon naps.

Maintaining Air Quality

Setting up a nursery is not just about creating a visually pleasing space but also ensuring it’s safe and healthy.

Low-VOC and Non-Toxic Paints: VOCs (Volatile Organic Compounds) are harmful chemicals in many traditional paints. For a nursery, choosing low-VOC or no-VOC paints is imperative, which are safer for both the baby and the environment.

Ventilation: Always ensure proper ventilation during and after painting, regardless of the type of paint you choose. Keeping windows open allows any lingering fumes to dissipate quickly, ensuring a fresh atmosphere once your baby moves in.

Air-Purifying Plants: As mentioned, certain plants can be both decorative and functional. Plants like Boston ferns, snake plants, and rubber plants add greenery and help filter out common indoor pollutants, thus maintaining pristine air quality.

In the whirlwind of anticipation that comes with expecting a new baby, designing a nursery can be both a joyful and overwhelming task. Yet, by understanding the subtle nuances of colour psychology, finishes, and complementary design elements, parents can craft a space that is more than just visually appealing—a tranquil haven for their little ones. Every choice, from paint shades to soft furnishings, contributes to the atmosphere of serenity. So, dear parents, as you embark on this beautiful journey, trust your instincts, draw inspiration, and remember that the most crucial element in any room is the love and warmth that fills it.…